Categories
Hot Water Systems

Buying Guide For Hot Water Heaters Sydney

If your old hot water heater has a 6 years warranty and it is into service for 10 years, then it is high time you need to think of a new one.

Especially in places with hard water, this may act adversely on water heaters and the machine may not last long after the warranty period.

If you are searching out for a good water heater, there are many models of electric hot water systems available now in the market of different capacity, working mechanisms, makes, and models.

How To Choose The Best Hot Water Heater

Choosing a sufficient water heater model for your home need is so important; however, this is a task demanding a little knowledge and expertise to accomplish.

It is a fact that water heating takes up almost 20 per cent of energy consumption of an average household, and this percentage may go up during the wintertime.

As per the new standards of energy efficiency, a good water heater under 200-litre capacity will have 4 per cent increase in energy efficiency whereas a heater of 200 litres or more capacity can help cut down the utility bills for water heating by 25 to 50 per cent.

There are various technologies used for water heating now, and each of these has significant advantages to offer.

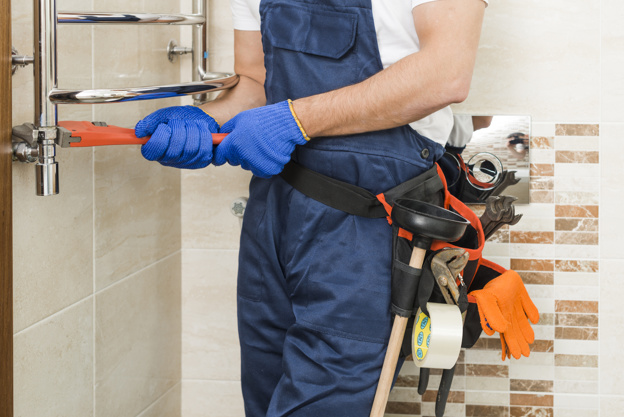
Ask a leading hot water heater plumber

While considering a water heater, it is good to consult a professional to gain a good understanding of the new regulations and enjoy the best energy efficiency advantages.

Looking at the star rating and also having a basic knowledge of the heater properties will help you make a better purchasing decision for long-term benefits.

Evaluating the capacity

The primary parameter, on the basis of which most of the water heater models are sold, is its capacity in terms of how many litres of water each can hold.

As a classic example, a family consists of four members who may take showers, use the dishwasher, and wash a load of laundry may be using about 400 litres a day.

While considering water heater capacity, the basic concepts to understand are; First-hour rating (FHR) for storage-tank water heaters and, Gallons-per-minute rating (GPM) for tankless heaters.

These measures will tell you about the volume of hot water a heater can dispense over a basic amount of time, say in the first one hour.

After consumption of this initial volume, the water may be less hot or fully cooled. It would again take a certain amount of time-based on the model to regain complete FHR.

professional hot water systems plumber can estimate the capacity of storage needed based on your daily hot water consumption and suggest a perfect sized model.

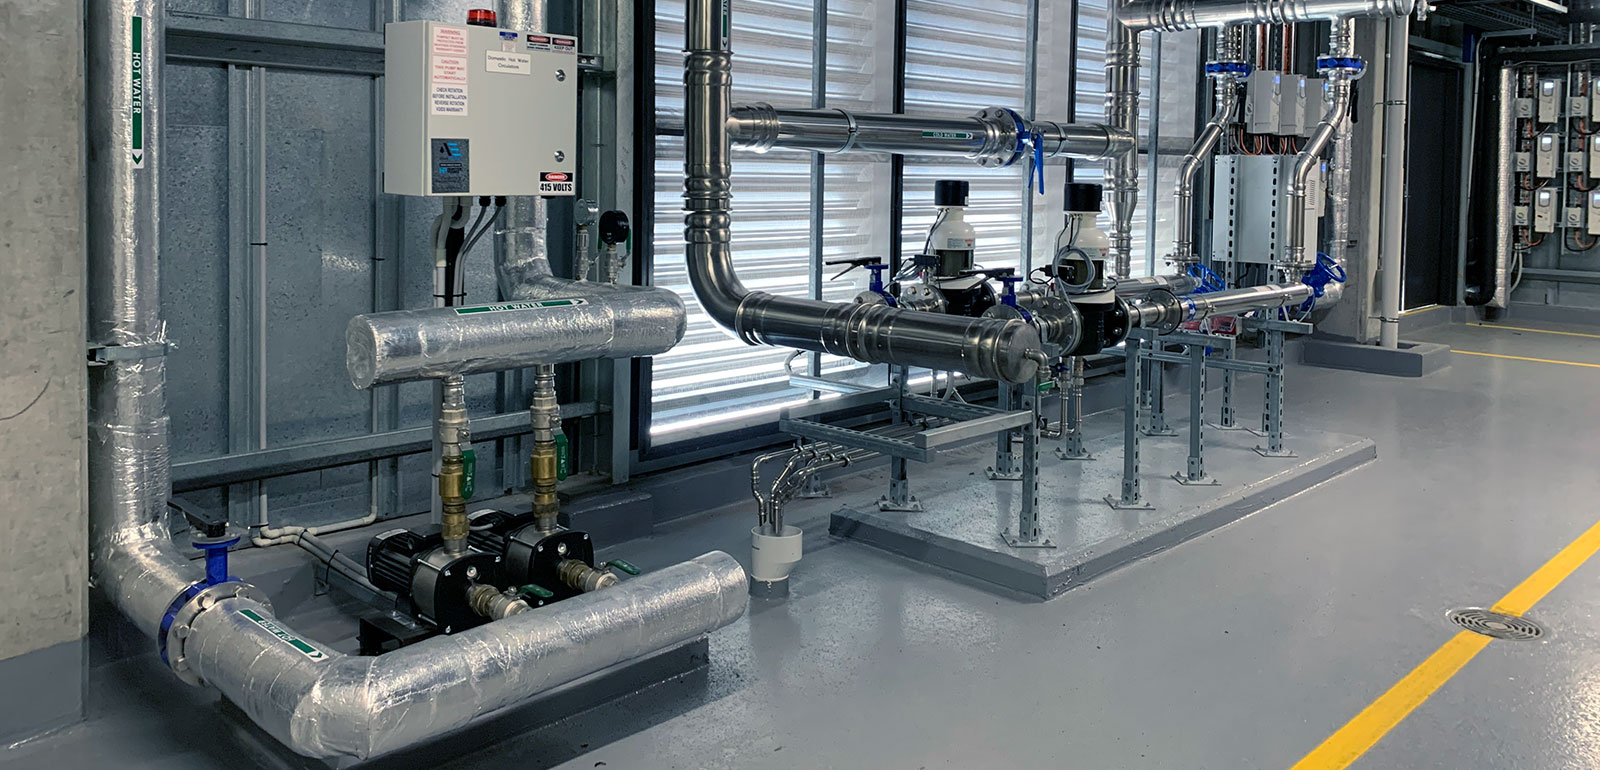
Hot water heater types

Based on the volume of water you use, there are various choices to make. Some new-age models even cut the cost up to half of the regular models.

Some generic choices to make are;

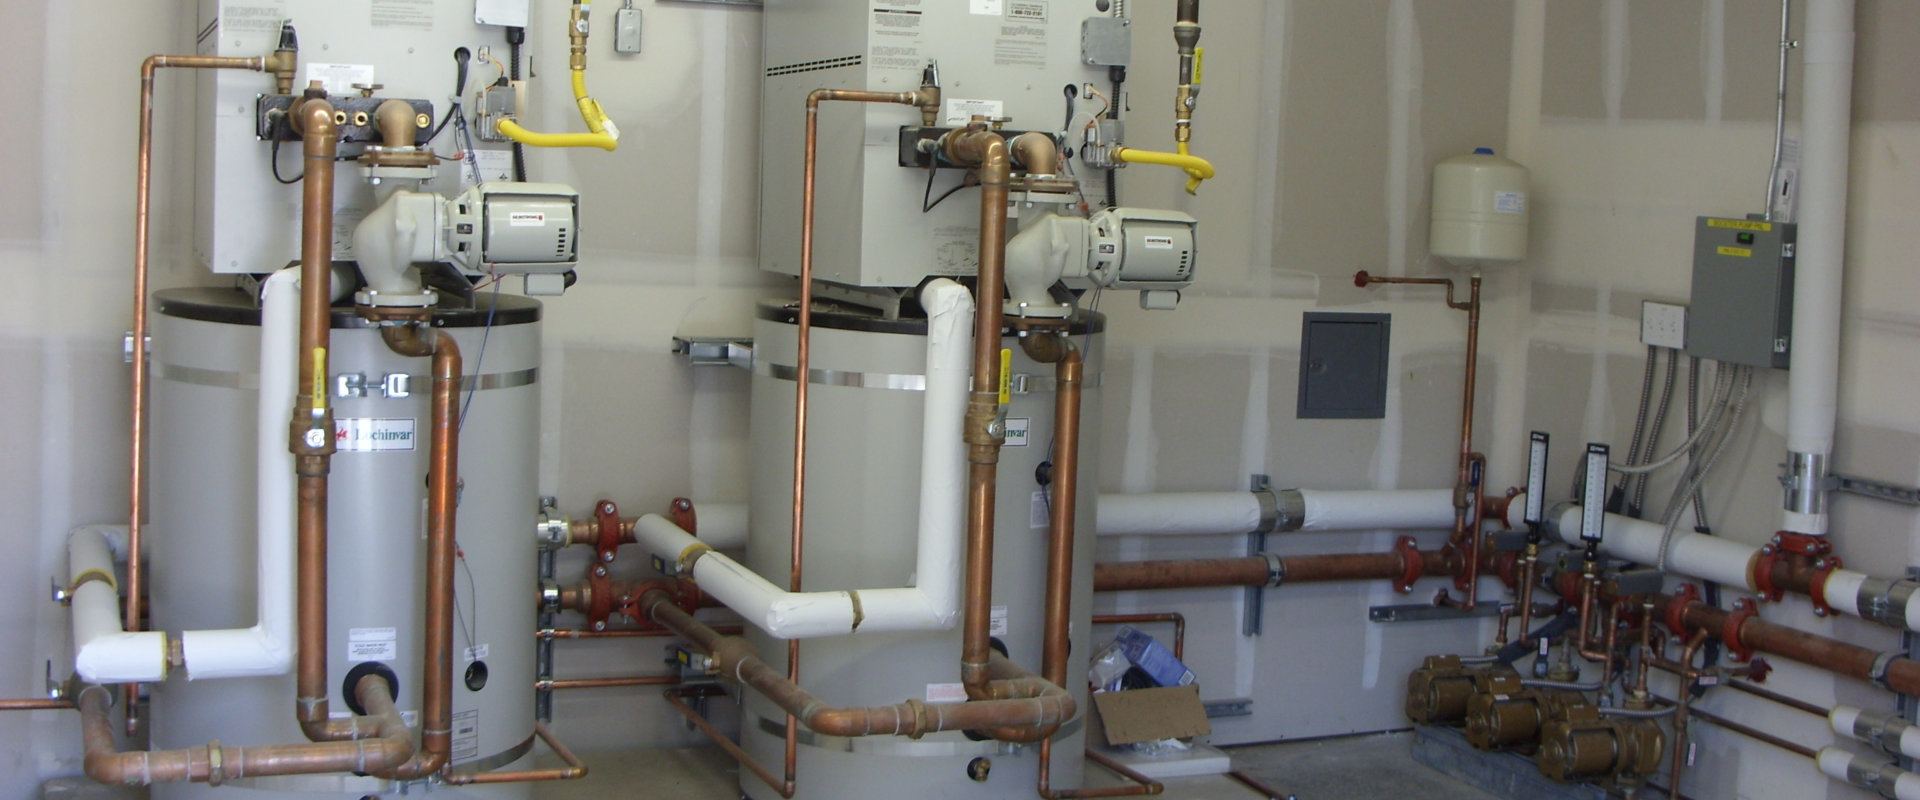
Storage tank heater — This the most basic model of electric water heaters. As the name implies, these consist of insulated storage in which water gets heated and stored and emerges through a pipe. A useful source for more details.

On-demand tank-less water heater — Tank-less heaters use heating coils which are immersed in water and water gets quickly heated as and when needed. These models are bit more energy-efficient than storage tank models, but only offers a limited volume of hot water at a time, say 10 litres per minute.

Heat pump water heaters — These heaters capture the heat from the air and transfers it to water for quick heating. These hybrid models are found to use 60 per cent lesser energy than full electric heaters. Apart from electric, there are solar water heaters also popular now, but when it comes to simplicity and high efficiency at all seasons, many people still prefer to use good model electric water heaters.

Categories
Uncategorized

Licenced Plumber Sydney

5 Plumbing Jobs That Need To Be Done By A Licenced Plumber Sydney

When it comes to facing an at-home project, many of us think we are the king or queen of DIY.

Although we may be pretty good at some projects, the truth of the matter is that there are just some projects that should be left to the professionals.

Here are 5 plumbing jobs that need to be undertaken by a licenced Sydney plumber, just like us:

1 Remodelling The Bathroom:

While revamping the plumbing in your bathroom can increase the overall value of your home, completing it yourself is a very risky task.

You want this new bathroom to increase your bank balance, not quickly empty your bank account to fix the mess you have made. Leave the task of installing plumbing fixtures in your bathroom to the professionals.

2 Rerouting or Replacing Sewer Pipes:

When one of your sewer pipes leading into your home is clogged, do not try to fix it on by yourself. Rather, you should report the problem at once to a professional plumber. Blocked sewer pipes require a lot of heavy-weight equipment that you most likely won’t have lying around at home. Calling on qualified plumbers will take the trouble of out your hands.

3 Replacing Old Piping:

Has the piping in your plumbing system become rusty or cracked? Have a burst pipe?

It may seem inviting to develop your plumbing skills with what seems like a simple DIY task. But the truth is, replacing old pipes is an extremely complicated task and involves taking out a significant portion of piping from your home.

4 Gas Line Plumbing:

Working with gas is incredibly hazardous, end of story. Professional, qualified plumbers are trained in dealing with gas utilising appliances safely to make sure your home stays as safe as possible.

Never attempt to make any repairs to any gas issue yourself, as you might think that you have fixed the problem, however, you could have just made it work.

Always call a professional plumber for your gas line plumbing troubles.

5 Septic Tank Installation:

The smell from a leak in your septic tank could be the turning point as to when you begin to attempt a DIY fix.

Yet, it may be very hard to locate exactly where the problem is when it comes from the septic tank. A professional plumber will know what to look out for and can undergo repairing faults immediately.

Call us today to get your plumbing problems repaired safely, quickly and properly with the leading licenced plumber in Sydney – Inline Plumbing

Categories
Uncategorized

Commercial Plumbing Service Sydney

At Inline Plumbing, we offer professional and reliable commercial plumbing solutions to businesses, strata managers, and commercial property owners. Our years of experience and long-established reputation for excellence make us the preferred choice for commercial properties and buildings across Sydney. By working with us, our commercial customers can continue to run their businesses uninterrupted.

Our Commercial Plumbing Sydney Services

Inline Plumbing provides a comprehensive array of commercial plumbing services specifically designed for commercial properties. Our proficiency extends to installations, repairs, Maintenance of plumbing issues, fittings, and more. No matter the requirements of your business, we are fully equipped to address them all. 

Whether it’s clearing blocked drains in commercial settings or detecting leaks, we possess a deep understanding of the intricacies involved in resolving plumbing issues within commercial spaces.

Our commercial plumbing solutions in Sydney adhere to the highest quality standards, guaranteeing that your plumbing repair, installation, or maintenance projects are carried out with utmost efficiency. 

We prioritize constant communication with our clients, which includes homeowners, builders, and real estate agents. This ensures the preservation of the integrity of the plumbing infrastructure crucial for the real estate sector.

Our Commercial Plumbing Services In Sydney Include

  • Mixing valve for thermostat installation and testing
  • Installation of gas lines and pipes
  • Installation and maintenance of commercial drainage
  • Detection and repair of leaks in water systems
  • Kitchen and bathroom installations, repairs, and maintenance
  • Heating system repairs and installation (gas, electric, and solar)
  • Installation, testing, and repairs of commercial ovens, stoves, and more
  • Tests and maintenance for Backflow devices
  • Repairs for gas leaks, detection of gas leaks, and fittings
  • Emergency plumbing services
  • Maintenance and preventive services
  • Cleaning drains, conducting drainage inspections, and repairs

Reasons To Choose Inline Plumbing

Inline Plumbing specialises in delivering dependable and expert commercial plumbing services tailored for businesses, strata administrators, and commercial property proprietors. 

With years of profound expertise and a well-established reputation for excellence, we stand out as the premier option for commercial structures and construction ventures across Sydney. Our collaborations with commercial partners guarantee smooth business operations, minimising disruptions. Reach out to us today to address any plumbing issues you may encounter.

Same-Day Service

For emergency plumbing issues in commercial properties, our staff is available 24 hours a day, providing same-day service to address and resolve your urgent plumbing concerns promptly.

Licensed And Insured Professionals

Our team of commercial plumbers is certified and insured to work in commercial settings, offering you peace of mind knowing that our expert service has your back.

Upfront Pricing. No Hidden Fees

After assessing your needs, we provide upfront pricing without any hidden charges. Our transparent and straightforward process ensures a smooth collaboration with our team of commercial service experts.

Stay Up-To-Date With Our Blog

Stay updated on the most recent news, trends, and valuable information through our blog. We are committed to delivering valuable insights to our customers and the global community.

Contact Us

Interested in experiencing the difference with Inline Plumbing? Reach out to us to discuss your commercial plumbing requirements. We’re ready to provide expert, reliable, and customised solutions to enhance the efficiency of your plumbing systems and contribute to the overall success of your enterprise. We’re pleased to set a new standard in professional commercial plumbing. Welcome to Inline Plumbing!

Categories
Uncategorized

Water Pipe Replacement

3 Indications – You Need To Replace Your Pipes

Sydney has its share of older houses, and with this comes older plumbing systems that may need upgrades or water pipe replacements.

It is not a pleasant possibility to consider, but in a few cases it could be necessary.

Fortunately, you have access to Sydney’s most experienced and highly regarded plumbers on hand to not only replace your worn out pipes, but to do so with efficiency and speed to make your homes plumbing system function better.

Here are 3 warning signs that signify your pipes need to be replaced as expediently as possible.

1.     Rusty Water

Seldom, rusty water may come from a hot water heater that needs replacing, typically if the rust or discolouration only appears when you turn on the hot water.

If the discolouration arises from both cold and hot water, it means there is corrosion somewhere inside the pipe system itself.

A qualified plumber can pinpoint the problem area and safely replace the damaged piping.

2.     Lead Pipes

Lead pipes are dangerous and are no longer up to code, but there are some old towns in Sydney s where some buildings carry outdated plumbing.

This can pose as a health risk to you and your family if left in place; it is of utmost importance you get them replaced as soon as possible.

3.     Leaks and Pits

Show Up If you can spot corrosion and pitting in your pipes, take that as a wake up call saying they need replacing.

Otherwise, they could spring a leak, add rust and/or any other contamination to your clean water in no time.

Likewise, if a leak has already been sprung due to that corrosion, then nows the time to replace the corroded pipe, or any pipe for that matter.

Whenever you spot any indication that you need to replace your pipes, call upon the experts at Inline Plumbing to do the job right!

Categories
Hot Water Systems

Gas Hot Water Heater Service Troubleshooting

One of the most common problems with a gas hot water heater is the pilot light blowing out, as this will result in only cold water throughout the house.

In this video you will discover how the pilot light lies within the inner and outer cover with help from a master licenced plumber specialist.

VIDEO TRANSCRIPTION

Gas Hot Water Heater Service & Advice

On a gas water heater one of the main things that can go wrong- you know, you wake up, you got cold water, you want to take a shower- it’s usually the pilot light that has gone out and that can be created by many different things, something as simple as a windy night the previous night and just blow it out.

To go over this and to troubleshoot this and figure it out, what we do first and foremost is make sure that the unit is not touched up here; that it’s in the “on” position and that your thermostat is turned up to where it is, which probably is where it is just because that’s where you left it but, sometimes the kids will come through and mess with things, you never know.

At any rate, if that’s all good and you still got cold water, what we do is check for the pilot light. To do this in a standard water heater we remove this cover which is the outer cover. There is also an inner cover.

If you do not have both, you need both, so find one if you don’t. And for that, you probably need to call a certified technician.

So, you take this off and up like this, run it through- that’s the simplest way and I’ll tell you why when we go to put it back in. the next thing is to look in and we follow these tubes down and in and what they do is attach to what’s called a pilot assembly, and that pilot assembly there are three components; the main gas that comes in and through and goes past that it actually attaches to and goes to the burner.

There are three lines that go down in here, you follow them in to find out where the pilot is. The pilot assembly itself is right here.

This is the thermocouple. What the thermocouple is is what the pilot flame actually fires against to create a little bit of an electric energy that holds a magnet inside of the gas valve.

The next is the main gas valve which doesn’t have to do with the pilot except for the simple fact the pilot assembly attaches to it with a couple of little screws and brackets that’s there. The third is the pilot tube itself, which is what runs over and into the pilot assembly that the gas actually travels through into the pilot to make it go.

This is where the pilot tube attaches to the pilot assembly.

Following up from that there’s what we call the pilot itself, that’s where the pilot light comes out. That’s a hooded thing that shoots the pilot across over to the thermocouple.

The thermocouple goes up in past that typically to the left, sometimes it’s to the right, but it’s always to the side either way and that’s where the flame blows against. Some pilot assemblies are vertical as opposed to horizontal and you’ll be able to spot the thermocouple.

Always follow the copper line for thermocouple because that’s typically where your problem ends up being if your pilot is burned out or won’t bite after you light the unit itself. So, those are the components that are in there. What you’re looking for is a small blue flame in there.

If you see that, there’s probably something else wrong with your gas valve or something along those lines that needs to be addressed, probably by a certified person and I’d recommend that you call them out as opposed to trying to troubleshoot any further past that.

Now, what we’ll do is going over how to light a pilot light. Okay. To light a pilot light, the first thing you need to do, make sure your gas is on over to the side. The next thing you need to do is make sure this is in the pilot position matching up with the hash mark that’s on the front of the gas valve.

As you can see, it has a little slot that lines up with that hash mark and it says “pilot”, pointing out towards you to the front. The next thing that you need to do is depress the pilot button.

With the pilot button depressed, you hold this down and then you light down in the water heater to light the pilot, and then you hold this button in- this knob in- for about a minute.

What it’s doing is that flame is blowing against your thermocouple to prove that you’ve flame inside. There’s a bi-metal product and what it does is it creates a little bit of magnetic energy up inside this cylinder in it. So as you hold this button in, it pushes against this and as that energy is created it’s transferred and it holds down that little magnetic button.

So once it’s done, after you’ve held it for about a minute or so, you let it up and that pilot should stay lit. Now remember, this has to be held down for a minute. You have to see that flame for a minute. If you do that and the flame stays on, what you do, turn your knob to vacation mode or pilot mode- some of the other ones have a pilot mode- and you turn it to the “on” position.

After that you go ahead and do a test by turning this, you’ll hear it click and then you’ll hear flame go and see the flame. If you see that, you’re good to go.

The next thing you want to do, shut it back off because you don’t want to put all the doors on before you know you’ve got a flame. You shut it back off and then you proceed to put the inner door on. To do this, most people this is kind of a tricky thing even though it doesn’t look like it, you start upside down and you wrap it in and then it slides right into place.

And then the next thing you do is put the outer door on and slide it down into its little-slotted place and then go ahead and set the temperature back up on your thermostat and you’ll hear the water heater fire. Now something I’ll let you know, in a gas water heater sometimes when you fire it up and it’s been a cold tank all night or more, you’ll hear a dripping or a hissing inside and it sounds like it’s leaking; this is completely normal.

If a tank is dead cold what happens is that with the energy transfer of the flame against the tank, there’s condensation that happens and as it builds up and into flow, it will drip down and hit the burner and it makes a sizzling sound, just like dropping water into a hot vat of oil, it makes a sizzle sound or if you have a wood-burning fireplace you can drop water on it and watch it dance.

The Same concept inside of here, so that’s completely normal. Sometimes even a little bit of moisture around it, if it’s fired up brand-new with cold water, is completely normal.

Categories
Hot Water Systems

Rheem 4 Star Gas Water Heater

In your Rheem 4 Star gas water heater, there is a small pilot flame that should remain alight at all times.

This small flame lights the main burner whenever water in the tank needs heating. If you can’t get hot water it may be because the pilot flame has gone out and thus, there’s no way for the main burner to be relit.

This could occur for a number of reasons such a strong winds, gas maintenance work carried out in the street or an empty LPG cylinder. Today, we’ll show you the safe correct way to relight your gas water heater.

As you’ll see, it’s quite easy.

However, it is vital that you follow this procedure exactly to prevent a buildup of gas, which if ignites, can cause serious injury. Before beginning, ensure all flames and ignition sources including cigarettes and lighters are kept well away from the area.

CHECK FOR GAS LEAKS

First, remove the access panel.

The instructions for relighting are clearly laid out inside this panel. It is important to ensure there are no gas leaks. This is best done by simply smelling for gas, especially down the floor level where gas can accumulate.

If you smell gas, turn the gas control knob to the “off” position. Shut off the isolation valve in the gas line.

Leave the area and call for a qualified service technician.

TURN OFF CONTROL AND WAIT FIVE MINUTES

Once you’ve confirmed there are no gas leaks, turn the gas control knob fully clockwise to the “off” position. You should feel the control knob clicking to the “off” position.

Do not use tools to turn the knob. If you cannot turn the knob by hand call a service technician or licensed gasfitter.

It is vital at this point that you wait five minutes for any unburned gas to escape. If you do not wait the full five minutes, residual gas may ignite and cause serious injury.

LIGHT THE PILOT

Once five minutes has elapsed, we’re ready to light the pilot using the igniter button. You must remember that this button produces a spark that will ignite any gas that is nearby.

This is why it is so important that you turn the control knob to “off” and wait five minutes for the gas to dissipate before every time you use the igniter button. Next, turn the control knob to the pilot position.

This is the symbol that looks like a starburst. Depress the control knob fully and keep holding the knob down to allow sufficient gas to flow to the pilot light.

After waiting for 30 seconds with the control knob held down, keep the control knob down and now press the igniter button repeatedly for about 40 seconds. Keep your face clear of the combustion chamber.

At this point, the pilot should be alight. It is important that you continue to hold the control knob down for a further 20 seconds for the pilot light to establish itself. You can now release the knob. Once the control knob is released, check that the pilot is alight. Do this by looking into the combustion chamber just below the gas control. The pilot will be visible as a very small blue flame.

IF THE PILOT IS NOT ALIGHT

If the pilot is not alight, it is vital that you turn the gas control knob to off then once again, wait for five minutes for the gas to disperse. Once five minutes is up, begin the pilot lighting process again from the start- back where we turn the control knob from the “off” position to the pilot position.

ONCE THE PILOT IS ALIGHT

Once the pilot is alight, it’s important for your safety that you remove your face from directly in front of the combustion chamber opening. Then turn the control knob anti-clockwise to at least five.

This will allow the main burner to light whenever the water needs heating. When the main burner lights up, it can be a little noisy for the first 2 to 5 seconds, this is perfectly normal.

It will very soon settle down to a quiet flame. You can now replace the access panel.

LET’S REVIEW

As you can see, it’s a straightforward procedure but does need to be followed exactly.

  1. Turn the control knob to off.
  2. Wait five minutes for gas to disperse.
  3. Now turn the control knob to pilot.
  4. Press the control knob down for 30 seconds.
  5. Keep holding the control knob down; press the igniter repeatedly for 40 seconds.
  6. Keep holding the control knob down for a further 20 seconds while the pilot establishes itself.
  7. Check the pilot. If the pilot is alight, pull your face away and turn the control knob to at least five. Remember, if at any time during the lighting process the pilot flame is not alight when you expect it to be, turn the gas control to “off” and wait 5 minutes before starting again.

If you’re unsure of the lighting process, or the burner does not light as expected; call the team at Inline Plumbing.

Thank you for watching and we hope you enjoy many years of safe, steady hot water.

Categories
Plumbing Services

3 Ways To Spot A Slab Leak

A slab leak is a serious problem in your house, mainly because it can be very hard to detect or access.

The problem becomes apparent when a pipe that is built into the base of your house, beneath a concrete courtyard or another inaccessible location, springs what would usually be an ordinary leak. These days, plumbers can use advanced technology to identify the leak and repair the pipe, but the main issues arise when detecting it.

The further along a slab leak goes, the increase in damage it causes, and while Sydney has its share of professional plumbers, they won’t be much help if you don’t know how to catch the signs of trouble when they come about.

Hence, here are three ways to detect a slab leak that can save you a lot of cash.

  1. Spikes in Your Water Bill
    The quickest and easiest way to detect a slab leak is to literally follow the money. If your water bill suddenly spikes in cost, particularly if you haven’t been using the water more than you usually would, then it could indicate a leak. Additionally, if the leak cannot be easily spotted, it is likely that there is a problem in a pipe that is tucked away, such as a slab leak.
  2. Noises
    Running water does make a noise, and in fact, this forms one of the many ways professional plumbers can detect a slab leak: high-tech sound detectors. The everyday person most likely don’t have access to this sort of equipment, so keep your ear peeled for sounds of trickles, drips or running water on your property when there is no apparent source.
  3. Puddles and Spots
    If you’re fortunate, the slab leak will form a puddle or even a moist spot where none should occur, waving a big red flag right at the source of the trouble. Nevertheless, even if there is no obvious moisture, you can still detect a slab leak if you notice cold or warm spots on your concrete, where the leaking water below it has altered the temperature.

If you experience any of the warning signs as mentioned above, and believe it could potentially have a slab leak problem, then call us right away!

Categories
Hot Water Systems

How To Relight A Rheem Stellar

Rheem Stellar Relight Procedure

In your Rheem Stellar gas water heater, there is a small pilot flame that should remain alight at all times.

This small flame lights the main burner whenever water in the tank needs heating. If you can’t get hot water it may be because the pilot flame has gone out and thus, there’s no way for the main burner to be relit. This could occur for a number of reasons such a strong winds, gas maintenance work carried out in the street or an empty LPG cylinder.

Today, we’ll show you the safe correct way to relight your gas water heater. As you’ll see, it’s quite easy. However, it is vital that you follow this procedure exactly to prevent a buildup of gas, which if ignites, can cause serious injury. Before beginning, ensure all flames and ignition sources including cigarettes and lighters are kept well away from the area.

CHECK FOR GAS LEAKS

First, remove the access panel. The instructions for relighting are clearly laid out inside this panel. It is important to ensure there are no gas leaks. This is best done by simply smelling for gas, especially down the floor level where gas can accumulate. If you smell gas, turn the gas control knob to the “off” position. Shut off the isolation valve in the gas line. Leave the area and call for a qualified service technician.

TURN OFF CONTROL AND WAIT FIVE MINUTES

Once you’ve confirmed there are no gas leaks, turn the gas control knob fully clockwise to the “off” position. You should feel the control knob clicking to the off position. Do not use tools to turn the knob. If you cannot turn the knob by hand call a service technician or licensed gasfitter. It is vital at this point that you wait five minutes for any unburned gas to escape.

If you do not wait the full five minutes, residual gas may ignite and cause serious injury.

LIGHT THE PILOT

Once five minutes has elapsed, we’re ready to light the pilot using the igniter button. You must remember that this button produces a spark that will ignite any gas that is nearby.

This is why it is so important that you turn the control knob to “off” and wait five minutes for the gas to dissipate before every time you use the igniter button. Next, turn the control knob to the pilot position.

This is the symbol that looks like a starburst. Depress the control knob fully and keep holding the knob down to allow sufficient gas to flow to the pilot light.

After waiting for 30 seconds with the control knob held down, keep the control knob down and now press the igniter button repeatedly for about 40 seconds. Keep your face clear of the combustion chamber. At this point, the pilot should be alight. It is important that you continue to hold the control knob down for a further 20 seconds for the pilot light to establish itself. You can now release the knob. Once the control knob is released, check that the pilot is alight.

Do this by looking into the combustion chamber just below the gas control.

The pilot will be visible as a very small blue flame. IF THE PILOT IS NOT ALIGHT If the pilot is not alight, it is vital that you turn the gas control knob to “off” then once again, wait for five minutes for the gas to disperse. Once five minutes is up, begin the pilot lighting process again from the start- back where we turn the control knob from the off position to the pilot position. ONCE THE PILOT IS ALIGHT Once the pilot is alight, it’s important for your safety that you remove your face from directly in front of the combustion chamber opening. Then turn the control knob anti-clockwise to at least six. This will allow the main burner to light whenever the water needs heating.

When the main burner lights up, it can be a little noisy for the first 2 to 5 seconds, this is perfectly normal. It will very soon settle down to a quiet flame.

You can now replace the access panel.

LET’S REVIEW

As you can see, it’s a straightforward procedure but does need to be followed exactly.

  1. Turn the control knob to off.
  2. Wait five minutes for the gas to disperse
  3. Now turn the control knob to pilot
  4. Press the control knob down for 30 seconds
  5. Keep holding the control knob down; press the igniter repeatedly for 40 seconds.
  6. Keep holding the control knob down for a further 20 seconds while the pilot establishes itself.
  7. Check the pilot. If the pilot is alight, pull your face away and turn the control knob to at least six.

Remember, if at any time during the lighting process the pilot flame is not alight when you expect it to be, turn the gas control to “off” and wait 5 minutes before starting again.

If you’re unsure of the lighting process, or the burner does not light as expected; call Rheem Service on 131031. Thank you for watching and we hope you enjoy many years of safe, steady hot water.

Categories
Plumbing Services

Leaking Hot Water Heater

How to Fix a Leaking Hot Water Heater

If your hot water heater’s drain valve is leaking or doesn’t allow for good water flow, it’s time to replace the valve.

This is a relatively easy job you can do yourself in about 30 minutes.

You’ll need a

  • replacement drain valve
  • an adjustable wrench
  • Teflon tape
  • flat-blade screwdriver
  • a garden hose
  • and a couple of rags or towels.

Refer to the hot water heater manufacturers website for ordering the drain valve for your specific water heater or contact a staff member at Inline Plumbing for some friendly advice.

Caution: When Draining Your Hot Water Heater

Before we begin, a note of caution: draining your water heater may put you at risk of being scalded by hot water, so please, be careful.

First, turn off the power to your electric water heater at the circuit breaker. For gas heaters, you should also turn off the gas supply.

Next, fasten a length of garden hose to the drain valve at the bottom of the heater. Run the other end of the hose to the nearest floor drain or outside the home. Don’t try to use a bucket; there’s simply too much water in the tank. Close the shut-off valve at the cold water inlet line.

Open a hot water faucet somewhere in the house that will relieve the system pressure inside the tank.

Now, open the drain valve and allow the water to drain. You’ll probably notice some small, white particles of sediment as the flow gets started. Remember, the water will be hot. Be sure no one is near the drain hose so they don’t get scalded.

When all the water is drained out, close the drain valve and remove the hose. Remove the old drain valve with a wrench.

Some additional water may drain out during this step, so have a few rags handy.

Leaking Hot Water Heater Fix – Now you’re ready to install the new drain valve.

Use Teflon tape to seal the threads. Count out at least six wraps of tape. And once it’s tightened, make sure the new drain valve is in the closed position. Now you’re ready to fill the tank again. First, open a hot water faucet at a sink or tub somewhere in the house.

Then open the shut-off valve at the cold water inlet line. You’ll hear the heater start to fill. Check the new drain valve to make sure there are no leaks or drips. And when you have a steady stream of water from the open hot water faucet, turn the faucet off. Turn the power on to the water heater at the circuit breaker.

For gas heaters, turn the gas supply back on. You may need to relight your pilot per the instructions in your use and care manual. Finally, allow the water to heat back up. Recheck the new drain valve one more time to make sure it’s tight with no leaks or drips. And it’s a good idea to check again for leaks after 24 hours.

That’s it. You now have a water heater that will drain properly anytime you need to flush the tank or do a repair.

Categories
Hot Water Systems

How To Replace A Water Heater Anode Rod

Does the Anode Rod in your hot water heater keep failing?

Before replacing your Anode Rod, consider a different kind of hot water system

Did you know there are hot water systems that don’t use Anode Rods?

We’ll show you how to replace an Anode Rod shortly, but before you replace another Anode Rod in your hot water system there are some things you should consider. Are you replacing the Anode Rod more often than you should (once every 3-4 years)? If you find you need to replace your anode rod more often than recommended, it’s most likely you need to replace your hot water system.

If you need to replace your existing hot water system and you don’t want to deal with having to replace the anode rod every 3-4 years, you should consider installing an instant / continuous flow hot water system.

Instant hot water systems come with several advantages including: continuous hot water supply, compact units which save space in your home, no leaks, and temperature control.

Changing the Anode rod every four years is a great way to extend the life of your water heater.

An anode rod is a special metal element that’s meant to slowly dissolve so that the tank itself doesn’t corrode.

When the anode rod is depleted, it no longer offers corrosion protection for the tank.

So it’s best to replace the rod before that happens. I’ll show you how to do it.

You can order an anode rod replacement for your water heater by directly from the hot water heater manufacturer.

You’ll need

  • a replacement anode rod,
  • a socket wrench,
  • a 1 and 1/16 inch socket,
  • a 24-inch cheater bar or pipe,
  • a flat blade screwdriver,
  • Teflon tape,
  • a garden hose,
  • and a hacksaw.


  1. First, turn the power off to the water heater at the circuit breaker. For gas heaters, you should turn off the gas supply.
  2. Close the shut-off valve at the cold water inlet line. Open a hot water faucet somewhere in the house that will relieve the system pressure inside the tank. Next, fasten a length of garden hose to the drain valve at the bottom of the heater. Run the other end of the hose to the nearest floor drain or outside the home.
  3. Open the water heater’s drain valve and drain approximately two gallons of water from the tank. Locate the anode rod position on the top of the tank. It will be underneath one of the plastic caps. On older models, the anode rod may be exposed. Remove the plastic cap to expose the anode rod.
  4. If it’s not clearly visible down to the tank shell, take a flat blade screwdriver and carefully remove the insulation and expose the anode rod head.
  5. Using a 1 and 1/16th-inch socket, remove the anode rod by turning it counterclockwise. Have a rag handy because there will be some seepage of water around the anode rod’s location. In most cases, you’ll need a cheater bar or length of pipe to apply enough leverage to break the initial seal on the anode rod. Lift the anode rod out of the tank, but be careful, the metal may be hot. It will probably show some signs of deterioration.
  6. If it looks something like a half dissolved Alka seltzer, it’s been doing its job. Prepare the threads to the replacement anode rod with Teflon tape. Wrap six or more turns. Receipt the new anode rod and tighten thoroughly. If space above your water heater is tight, a flexible replacement anode rod makes the installation easier.
  7. Next, turn on a hot water faucet somewhere in the house. Turn the cold water supply to the heater back on and let the tank fill.
  8. After about a minute, turn off the hot water faucet, then check for leaks around the new anode rod. If there are no leaks, replace the plastic cap on top. Turn the power back on at the circuit breaker. For gas heaters, turn the gas supply back on. You may need to relight your pilot per the instructions in your use and care manual.
  9. Check carefully for leaks at the anode rod threads and check again in 24 hours.

Congratulations! You’ve just made an important repair that will greatly extend the life of your water heater.